STAGE 4
GRID infrastructure configuration
Before going ahead we have to copy oracle 11g r2 grid and database software , here i copied my softwares through my pen drive.But you may face problem as pen drive formatted with NTFS file system will not recognize in OEL . You can overcome this issue by installing "fuse-ntfs-3g-2010.5.22-1.el5.rf.x86_64.rpm" , and is available in internet.
I dumped all oracle related software in /install directory and change its permission to oracle:oinstall
[root@racha1 ~]#mkdir /install
[root@racha1 ~]# chown -R oracle:oinstall /install
[root@racha1 ~]# cd /install
[root@racha1 install]# ls
-r-xr-xr-x 1 root root 1239269270 Jul 25 01:14 linux.x64_11gR2_database_1of2.zip
-r-xr-xr-x 1 root root 1111416131 Jul 24 19:04 linux.x64_11gR2_database_2of2.zip
-r-xr-xr-x 1 root root 1052897657 Jul 25 16:10 oracle11gr2gridforLINUX.zip
[root@racha1 install]# unzip oracle11gr2gridforLINUX.zip
By unzipping oracle11gr2gridforLINUX.zip you will get one grid directory
[root@racha1 install]# unzip linux.x64_11gR2_database_1of2.zip
By unzipping linux.x64_11gR2_database_1of2.zip you will get one database direcotory , rename it as disk1
[root@racha1 install]#mv database disk1
[root@racha1 install]# unzip linux.x64_11gR2_database_2of2.zip
By unzipping linux.x64_11gR2_database_1of2.zip you will get one database direcotory
Now you have to copy the contents of '/install/database/stage/Components' to '/install/disk1/stage/Components' directory . If you omit this stage you will face problem during database installation.
[root@racha1 install]# mv /install/database/stage/Components/* /install/disk1/stage/Components/
SSH Configuration :
Manual SSH configuration not need for Oracle 11gr2, because of During grid infrastructure It will ask SSH setup. But i suggest to set up ssh manually as we can run runcluvfy.sh before going ahead with actual grid installation
Node 1 :
[root@racha1 ~]# su - oracle
[oracle@racha1 ~]$ mkdir ~/.ssh
[oracle@racha1 ~]$ chmod 700 ~/.ssh
[oracle@racha1 ~]$ /usr/bin/ssh-keygen -t rsa
Generating public/private rsa key pair.
Enter file in which to save the key (/home/oracle/.ssh/id_rsa):
Enter passphrase (empty for no passphrase):
Enter same passphrase again:
Your identification has been saved in /home/oracle/.ssh/id_rsa.
Your public key has been saved in /home/oracle/.ssh/id_rsa.pub.
The key fingerprint is:
cf:36:68:1b:be:18:51:7d:7a:67:ee:b7:ee:8e:ca:0b oracle@racha1.localdomain
Node 2:
[root@racha2 ~]# su - oracle
[oracle@racha2 ~]$ mkdir ~/.ssh
[oracle@racha2 ~]$ chmod 700 ~/.ssh
[oracle@racha2 ~]$ /usr/bin/ssh-keygen -t rsa
Generating public/private rsa key pair.
Enter file in which to save the key (/home/oracle/.ssh/id_rsa):
Enter passphrase (empty for no passphrase):
Enter same passphrase again:
Your identification has been saved in /home/oracle/.ssh/id_rsa.
Your public key has been saved in /home/oracle/.ssh/id_rsa.pub.
The key fingerprint is:
7b:69:c1:7d:7e:b1:e8:62:72:1d:3d:ee:9b:d6:26:c6 oracle@racha2.localdomain
Node 1:
[oracle@racha1 ~]$ cd ~/.ssh
[oracle@racha1 .ssh]$ cat id_rsa.pub >> authorized_keys
[oracle@racha1 .ssh]$ scp authorized_keys racha2:/home/oracle/.ssh
The authenticity of host 'racha2 (192.168.2.202)' can't be established.
RSA key fingerprint is fd:dd:51:77:0d:46:69:f8:55:fe:2c:53:77:75:90:e0.
Are you sure you want to continue connecting (yes/no)? yes
Warning: Permanently added 'racha2,192.168.2.202' (RSA) to the list of known hosts.
oracle@racha2's password:
authorized_keys 100% 407 0.4KB/s 00:00
Node 2:
[oracle@racha2 ~]$ cd ~/.ssh
[oracle@racha2 .ssh]$ cat id_rsa.pub >> authorized_keys
[oracle@racha2 .ssh]$ scp authorized_keys racha1:/home/oracle/.ssh
The authenticity of host 'racha1 (192.168.2.201)' can't be established.
RSA key fingerprint is fd:dd:51:77:0d:46:69:f8:55:fe:2c:53:77:75:90:e0.
Are you sure you want to continue connecting (yes/no)? yes
Warning: Permanently added 'racha1,192.168.2.201' (RSA) to the list of known hosts.
oracle@racha1's password:
authorized_keys 100% 814 0.8KB/s 00:00
Check below for each node
Test the ssh connectivity
Node 1:
[oracle@racha1 .ssh]$ ssh racha2 date
[oracle@racha1 .ssh]$ ssh racha2-priv date
[oracle@racha1 .ssh]$ ssh racha1-priv date
Node 2:
[oracle@racha2 .ssh]$ ssh racha2 date
[oracle@racha2 .ssh]$ ssh racha2-priv date
[oracle@racha2 .ssh]$ ssh racha1-priv date
Prior to 11gR2 we would probably use the "runcluvfy.sh" utility in the clusterware root directory to check the prerequisites have been met. If you are intending to configure SSH connectivity using the installer this check should be omitted as it will always fail. If you want to setup SSH connectivity manually, then once it is done you can run the "runcluvfy.sh" with the following command.
[oracle@racha1 grid]$ ./runcluvfy.sh stage -pre crsinst -n racha1,racha2 -verbose
Performing pre-checks for cluster services setup
Checking node reachability...
Check: Node reachability from node "racha1"
Destination Node Reachable?
------------------------------------ ------------------------
racha1 yes
racha2 yes
Result: Node reachability check passed from node "racha1"
Checking user equivalence...
Check: User equivalence for user "oracle"
Node Name Comment
------------------------------------ ------------------------
racha1 passed
racha2 passed
Result: User equivalence check passed for user "oracle"
---- -- -- - -- -- -- - - ---- --- ---
------ -- -- - -- - -- - ---- - - - -
Starting Clock synchronization checks using Network Time Protocol(NTP)...
NTP Configuration file check started...
Network Time Protocol(NTP) configuration file not found on any of the nodes. Oracle Cluster Time Synchronization Service(CTSS) can be used instead of NTP for time synchronization on the cluster nodes
Result: Clock synchronization check using Network Time Protocol(NTP) passed
Pre-check for cluster services setup was successful.
If you get any failures be sure to correct them before proceeding.
Oracle Grid Infrastructure installation
Note:- It's a good idea to take a snapshot of the virtual machines, so you can repeat the following stages if you run into any problems. To do this, shutdown both virtual machines and copy racha1 , racha2 and shareasm folder
You only need to install oracle grid software from any of the two node , Oracle OUI automatically install the software on remaining nodes.
Install Grid Infrastructure
[root@racha1 ~]# chown -R oracle:oinstall /install/grid
[root@racha1 ~]# xhost +
access control disabled, clients can connect from any host
[root@racha1 ~]# su - oracle
[root@racha1 ~]#xclock ----> make sure you are getting clock display
[oracle@racha1 ~]$ cd /install/grid
[oracle@racha1 grid]$ ls
doc response runcluvfy.sh sshsetup welcome.html
install rpm runInstaller stage
[oracle@racha1 grid]$ ./runInstaller
Starting Oracle Universal Installer...
Checking Temp space: must be greater than 80 MB. Actual 19061 MB Passed
Checking swap space: must be greater than 150 MB. Actual 4031 MB Passed
Checking monitor: must be configured to display at least 256 colors. Actual 16777216 Passed
Preparing to launch Oracle Universal Installer from /tmp/OraInstall2011-07-25_10-18-49AM. Please wait ...[oracle@racha1 grid]$
Select the "Install and Configure Grid Infrastructure for a Cluster" option, then click the "Next" button.
Select the "Typical Installation" option, then click the "Next" button
On the "Specify Cluster Configuration" screen, click the "Add" button
Enter the details of the second node in the cluster, then click the "OK" button.
Test SSH Connectivity, by proving oracle username and password . Here I was already configured SSH.
Click the "Identify network interfaces..." button and check the public and private networks are specified correctly. Once you are happy with them, click the "OK" button and the "Next" button
Enter "/u01/app/11.2.0/grid" as the software location and "Automatic Storage Manager" as the cluster registry storage type. Enter the ASM password and click the "Next" button.
Note:- In oracle 11gr2 asm instance are managed by sysasm privilege . So you have to login with "sys as sysasm" to manage ASM instance in 11gR2
Select Disks, If its not show, choose change recovery path and add correct disk path here. These disks are should be oracle permission. Keep the redundancy as external
Here we are creating only one disk group , if you have enough storage you can create one more disk group .
Accept the default inventory directory by clicking the "Next" button.
Wait while the prerequisite checks complete. If you have any issues, either fix them or check the "Ignore All" checkbox and click the "Next" button.
When prompted, run the configuration scripts on each node.
Node 1:
[root@racha1 ~]# /u01/app/oraInventory/orainstRoot.sh
Changing permissions of /u01/app/oraInventory.
Adding read,write permissions for group.
Removing read,write,execute permissions for world.
Changing groupname of /u01/app/oraInventory to oinstall.
The execution of the script is complete.
[root@racha1 ~]#
Node 2:
[root@racha2 ~]# /u01/app/oraInventory/orainstRoot.sh
Changing permissions of /u01/app/oraInventory.
Adding read,write permissions for group.
Removing read,write,execute permissions for world.
Changing groupname of /u01/app/oraInventory to oinstall.
The execution of the script is complete.
[root@racha2 ~]#
Node 1:
[root@racha1 ~]# /u01/app/11.2.0/grid/root.sh
Running Oracle 11g root.sh script...
The following environment variables are set as:
ORACLE_OWNER= oracle
ORACLE_HOME= /u01/app/11.2.0/grid
Enter the full pathname of the local bin directory: [/usr/local/bin]:
Copying dbhome to /usr/local/bin ...
Copying oraenv to /usr/local/bin ...
Copying coraenv to /usr/local/bin ...
Creating /etc/oratab file...
Entries will be added to the /etc/oratab file as needed by
Database Configuration Assistant when a database is created
Finished running generic part of root.sh script.
Now product-specific root actions will be performed.
2011-07-25 14:43:57: Parsing the host name
2011-07-25 14:43:57: Checking for super user privileges
2011-07-25 14:43:57: User has super user privileges
Using configuration parameter file: /u01/app/11.2.0/grid/crs/install/crsconfig_params
Creating trace directory
LOCAL ADD MODE
Creating OCR keys for user 'root', privgrp 'root'..
Operation successful.
root wallet
root wallet cert
root cert export
peer wallet
profile reader wallet
pa wallet
peer wallet keys
pa wallet keys
peer cert request
pa cert request
peer cert
pa cert
peer root cert TP
profile reader root cert TP
pa root cert TP
peer pa cert TP
pa peer cert TP
profile reader pa cert TP
profile reader peer cert TP
peer user cert
pa user cert
Adding daemon to inittab
CRS-4123: Oracle High Availability Services has been started.
ohasd is starting
CRS-2672: Attempting to start 'ora.gipcd' on 'racha1'
CRS-2672: Attempting to start 'ora.mdnsd' on 'racha1'
CRS-2676: Start of 'ora.gipcd' on 'racha1' succeeded
CRS-2676: Start of 'ora.mdnsd' on 'racha1' succeeded
CRS-2672: Attempting to start 'ora.gpnpd' on 'racha1'
CRS-2676: Start of 'ora.gpnpd' on 'racha1' succeeded
CRS-2672: Attempting to start 'ora.cssdmonitor' on 'racha1'
CRS-2676: Start of 'ora.cssdmonitor' on 'racha1' succeeded
CRS-2672: Attempting to start 'ora.cssd' on 'racha1'
CRS-2672: Attempting to start 'ora.diskmon' on 'racha1'
CRS-2676: Start of 'ora.diskmon' on 'racha1' succeeded
CRS-2676: Start of 'ora.cssd' on 'racha1' succeeded
CRS-2672: Attempting to start 'ora.ctssd' on 'racha1'
CRS-2676: Start of 'ora.ctssd' on 'racha1' succeeded
ASM created and started successfully.
DiskGroup DATA created successfully.
clscfg: -install mode specified
Successfully accumulated necessary OCR keys.
Creating OCR keys for user 'root', privgrp 'root'..
Operation successful.
CRS-2672: Attempting to start 'ora.crsd' on 'racha1'
CRS-2676: Start of 'ora.crsd' on 'racha1' succeeded
CRS-4256: Updating the profile
Successful addition of voting disk 0cf9af8190014f43bf110fdde04e726a.
Successfully replaced voting disk group with +DATA.
CRS-4256: Updating the profile
CRS-4266: Voting file(s) successfully replaced
## STATE File Universal Id File Name Disk group
-- ----- ----------------- --------- ---------
1. ONLINE 0cf9af8190014f43bf110fdde04e726a (/dev/oracleasm/disks/DISK1) [DATA]
Located 1 voting disk(s).
CRS-2673: Attempting to stop 'ora.crsd' on 'racha1'
CRS-2677: Stop of 'ora.crsd' on 'racha1' succeeded
CRS-2673: Attempting to stop 'ora.asm' on 'racha1'
CRS-2677: Stop of 'ora.asm' on 'racha1' succeeded
CRS-2673: Attempting to stop 'ora.ctssd' on 'racha1'
CRS-2677: Stop of 'ora.ctssd' on 'racha1' succeeded
CRS-2673: Attempting to stop 'ora.cssdmonitor' on 'racha1'
CRS-2677: Stop of 'ora.cssdmonitor' on 'racha1' succeeded
CRS-2673: Attempting to stop 'ora.cssd' on 'racha1'
CRS-2677: Stop of 'ora.cssd' on 'racha1' succeeded
CRS-2673: Attempting to stop 'ora.gpnpd' on 'racha1'
CRS-2677: Stop of 'ora.gpnpd' on 'racha1' succeeded
CRS-2673: Attempting to stop 'ora.gipcd' on 'racha1'
CRS-2677: Stop of 'ora.gipcd' on 'racha1' succeeded
CRS-2673: Attempting to stop 'ora.mdnsd' on 'racha1'
CRS-2677: Stop of 'ora.mdnsd' on 'racha1' succeeded
CRS-2672: Attempting to start 'ora.mdnsd' on 'racha1'
CRS-2676: Start of 'ora.mdnsd' on 'racha1' succeeded
CRS-2672: Attempting to start 'ora.gipcd' on 'racha1'
CRS-2676: Start of 'ora.gipcd' on 'racha1' succeeded
CRS-2672: Attempting to start 'ora.gpnpd' on 'racha1'
CRS-2676: Start of 'ora.gpnpd' on 'racha1' succeeded
CRS-2672: Attempting to start 'ora.cssdmonitor' on 'racha1'
CRS-2676: Start of 'ora.cssdmonitor' on 'racha1' succeeded
CRS-2672: Attempting to start 'ora.cssd' on 'racha1'
CRS-2672: Attempting to start 'ora.diskmon' on 'racha1'
CRS-2676: Start of 'ora.diskmon' on 'racha1' succeeded
CRS-2676: Start of 'ora.cssd' on 'racha1' succeeded
CRS-2672: Attempting to start 'ora.ctssd' on 'racha1'
CRS-2676: Start of 'ora.ctssd' on 'racha1' succeeded
CRS-2672: Attempting to start 'ora.asm' on 'racha1'
CRS-2676: Start of 'ora.asm' on 'racha1' succeeded
CRS-2672: Attempting to start 'ora.crsd' on 'racha1'
CRS-2676: Start of 'ora.crsd' on 'racha1' succeeded
CRS-2672: Attempting to start 'ora.evmd' on 'racha1'
CRS-2676: Start of 'ora.evmd' on 'racha1' succeeded
CRS-2672: Attempting to start 'ora.asm' on 'racha1'
CRS-2676: Start of 'ora.asm' on 'racha1' succeeded
CRS-2672: Attempting to start 'ora.DATA.dg' on 'racha1'
CRS-2676: Start of 'ora.DATA.dg' on 'racha1' succeeded
CRS-2672: Attempting to start 'ora.registry.acfs' on 'racha1'
CRS-2676: Start of 'ora.registry.acfs' on 'racha1' succeeded
racha1 2011/07/25 14:57:56 /u01/app/11.2.0/grid/cdata/racha1/backup_20110725_145756.olr
Preparing packages for installation...
cvuqdisk-1.0.7-1
Configure Oracle Grid Infrastructure for a Cluster ... succeeded
Updating inventory properties for clusterware
Starting Oracle Universal Installer...
Checking swap space: must be greater than 500 MB. Actual 4031 MB Passed
The inventory pointer is located at /etc/oraInst.loc
The inventory is located at /u01/app/oraInventory
'UpdateNodeList' was successful.
[root@racha1 ~]#
Note:- while running root.sh oracle will silently load VIPCA and it will assign the virtual IP to the node available from /etc/hosts . You can see your VIP got configured as eth0:1
Node 2:
[root@racha2 ~]# /u01/app/11.2.0/grid/root.sh
]Running Oracle 11g root.sh script...
The following environment variables are set as:
ORACLE_OWNER= oracle
ORACLE_HOME= /u01/app/11.2.0/grid
Enter the full pathname of the local bin directory: [/usr/local/bin]:
Creating ] directory...
Copying dbhome to ] ...
Copying oraenv to ] ...
Copying coraenv to ] ...
Entries will be added to the /etc/oratab file as needed by
Database Configuration Assistant when a database is created
Finished running generic part of root.sh script.
Now product-specific root actions will be performed.
2011-07-26 09:35:41: Parsing the host name
2011-07-26 09:35:41: Checking for super user privileges
2011-07-26 09:35:41: User has super user privileges
Using configuration parameter file: /u01/app/11.2.0/grid/crs/install/crsconfig_params
LOCAL ADD MODE
Creating OCR keys for user 'root', privgrp 'root'..
Operation successful.
Adding daemon to inittab
CRS-4123: Oracle High Availability Services has been started.
ohasd is starting
CRS-4402: The CSS daemon was started in exclusive mode but found an active CSS daemon on node racha1, number 1, and is terminating
An active cluster was found during exclusive startup, restarting to join the cluster
CRS-2672: Attempting to start 'ora.mdnsd' on 'racha2'
CRS-2676: Start of 'ora.mdnsd' on 'racha2' succeeded
CRS-2672: Attempting to start 'ora.gipcd' on 'racha2'
CRS-2676: Start of 'ora.gipcd' on 'racha2' succeeded
CRS-2672: Attempting to start 'ora.gpnpd' on 'racha2'
CRS-2676: Start of 'ora.gpnpd' on 'racha2' succeeded
CRS-2672: Attempting to start 'ora.cssdmonitor' on 'racha2'
CRS-2676: Start of 'ora.cssdmonitor' on 'racha2' succeeded
CRS-2672: Attempting to start 'ora.cssd' on 'racha2'
CRS-2672: Attempting to start 'ora.diskmon' on 'racha2'
CRS-2676: Start of 'ora.diskmon' on 'racha2' succeeded
CRS-2676: Start of 'ora.cssd' on 'racha2' succeeded
CRS-2672: Attempting to start 'ora.ctssd' on 'racha2'
CRS-2676: Start of 'ora.ctssd' on 'racha2' succeeded
CRS-2672: Attempting to start 'ora.drivers.acfs' on 'racha2'
CRS-2676: Start of 'ora.drivers.acfs' on 'racha2' succeeded
CRS-2672: Attempting to start 'ora.asm' on 'racha2'
CRS-2676: Start of 'ora.asm' on 'racha2' succeeded
CRS-2672: Attempting to start 'ora.crsd' on 'racha2'
CRS-2676: Start of 'ora.crsd' on 'racha2' succeeded
CRS-2672: Attempting to start 'ora.evmd' on 'racha2'
CRS-2676: Start of 'ora.evmd' on 'racha2' succeeded
racha2 2011/07/26 09:41:40 /u01/app/11.2.0/grid/cdata/racha2/backup_20110726_094140.olr
Preparing packages for installation...
cvuqdisk-1.0.7-1
Configure Oracle Grid Infrastructure for a Cluster ... succeeded
Updating inventory properties for clusterware
Starting Oracle Universal Installer...
Checking swap space: must be greater than 500 MB. Actual 4031 MB Passed
The inventory pointer is located at /etc/oraInst.loc
The inventory is located at /u01/app/oraInventory
'UpdateNodeList' was successful.
[root@racha2 ~]#
Once the scripts have completed, return to the "Execute Configuration Scripts" screen on RAC1 and click the "OK" button
NOTE:- We expect the verification phase to fail with an error relating to the SCAN, assuming you are not using DNS.
INFO: Checking name resolution setup for "rac-scan.localdomain"...
INFO: ERROR:
INFO: PRVF-4664 : Found inconsistent name resolution entries for SCAN name "rac-scan.localdomain"
INFO: ERROR:
INFO: PRVF-4657 : Name resolution setup check for "rac-scan.localdomain" (IP address: 192.168.2.201) failed
INFO: ERROR:
INFO: PRVF-4664 : Found inconsistent name resolution entries for SCAN name "rac-scan.localdomain"
INFO: Verification of SCAN VIP and Listener setup failed
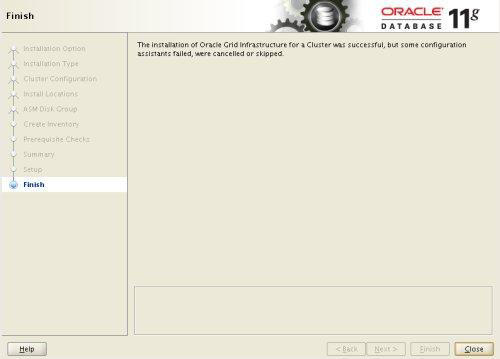
Provided this is the only error, it is safe to ignore this and continue by clicking the "Next" button.Click the "Close" button to exit the installer.
Check Cluster status for both nodes
[oracle@racha1 ~]$ export GRID_HOME=/u01/app/11.2.0/grid
[oracle@racha1 ~]$ export PATH=/u01/app/11.2.0/grid/bin
[oracle@racha1 ~]$ crsctl check cluster -all
**************************************************************
racha1:
CRS-4537: Cluster Ready Services is online
CRS-4529: Cluster Synchronization Services is online
CRS-4533: Event Manager is online
**************************************************************
racha2:
CRS-4537: Cluster Ready Services is online
CRS-4529: Cluster Synchronization Services is online
CRS-4533: Event Manager is online
**************************************************************
[oracle@racha1 ~]$ olsnodes
racha1
racha2
[oracle@racha1 ~]$ crs_stat -t -v
Name Type R/RA F/FT Target State Host
----------------------------------------------------------------------
ora.DATA.dg ora....up.type 0/5 0/ ONLINE ONLINE racha1
ora....ER.lsnr ora....er.type 0/5 0/ ONLINE ONLINE racha1
ora....N1.lsnr ora....er.type 0/5 0/0 ONLINE ONLINE racha2
ora.asm ora.asm.type 0/5 0/ ONLINE ONLINE racha1
ora.eons ora.eons.type 0/3 0/ ONLINE ONLINE racha1
ora.gsd ora.gsd.type 0/5 0/ OFFLINE OFFLINE
ora....network ora....rk.type 0/5 0/ ONLINE ONLINE racha1
ora.oc4j ora.oc4j.type 0/5 0/0 OFFLINE OFFLINE
ora.ons ora.ons.type 0/3 0/ ONLINE ONLINE racha1
ora.rac.db ora....se.type 0/2 0/1 ONLINE ONLINE racha1
ora....SM1.asm application 0/5 0/0 ONLINE ONLINE racha1
ora....A1.lsnr application 0/5 0/0 ONLINE ONLINE racha1
ora.racha1.gsd application 0/5 0/0 OFFLINE OFFLINE
ora.racha1.ons application 0/3 0/0 ONLINE ONLINE racha1
ora.racha1.vip ora....t1.type 0/0 0/0 ONLINE ONLINE racha1
ora....SM2.asm application 0/5 0/0 ONLINE ONLINE racha2
ora....A2.lsnr application 0/5 0/0 ONLINE ONLINE racha2
ora.racha2.gsd application 0/5 0/0 OFFLINE OFFLINE
ora.racha2.ons application 0/3 0/0 ONLINE ONLINE racha2
ora.racha2.vip ora....t1.type 0/0 0/0 ONLINE ONLINE racha2
ora....ry.acfs ora....fs.type 0/5 0/ ONLINE ONLINE racha1
ora.scan1.vip ora....ip.type 0/0 0/0 ONLINE ONLINE racha2
[oracle@racha1 ~]$
You can see gsd services are offline by default in 11g r2
The grid infrastructure installation is now complete. Now we have to install database software..


